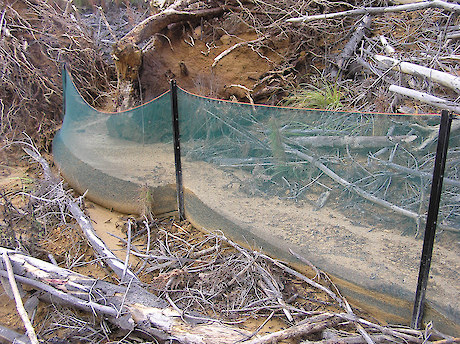
A well-constructed application for a sediment fence
 A well-constructed application for a sediment fenceSilt fences are designed to intercept sheet flow sediment-laden stormwater runoff, and filter out larger, and some of the smaller, sediment particles, but not dissolved clays. Silt fences, and the larger ‘super’ silt fences, are a short-term solution to reduce sediment movement until the site stabilises, and vegetation re-establishes. Silt fences are usually made from geotechnical fabric, but at times shade cloth can also be used to allow water to pass through it while filtering larger particle sizes. Silt fences can be used in conjunction with other sediment treatment measures, such as sediment traps or ponds.
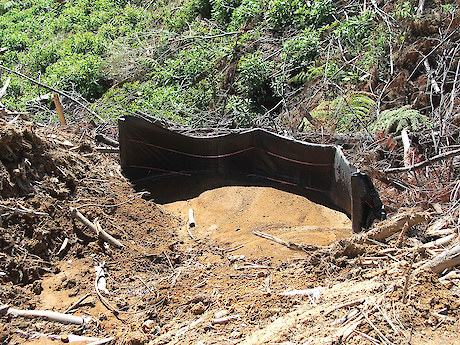
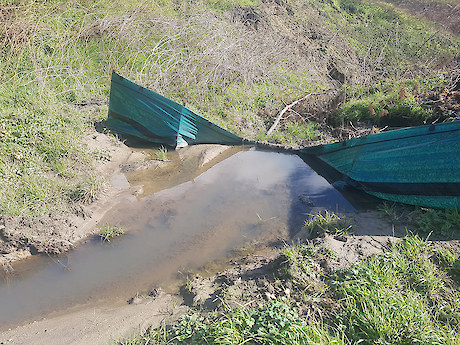
Silt fences need to be carefully located. Only use silt fences to intercept sheet flow water on low gradient sites, or in confined areas where the contributing area is small, less than 0.5 ha. Plan the location of silt fences to be constructed where they will not be overwhelmed by large flows. Use longer ‘super’ silt fences for larger areas, where the catchments are greater than 0.5 ha. Do not use them in larger areas, or in concentrated flow paths to capture sediment like rivers, gullies or in ditches. They are not designed to reduce water flow velocity. Fence fabric is only partially porous, so too much flow may cause them to fill too rapidly and either fail or be bypassed.
Silt fences also need to be correctly constructed. Make sure the correct fabric for the silt fence is selected. Silt fence fabric is a close weave and intended to capture fine sediment. Shade cloth and open weave fabrics will trap larger sediment grain sizes, but not fine sediment. It is also important to install the fence along the contour. If this is not possible, or where there are long sections of silt fence, install short silt fence returns projecting upslope from the silt fence, to minimise concentration of flow. Also, construct silt fence wings at either end to contain sediment where there is a risk of bypass.
Silt fence design criteria The following is an overview of the installation process:
- Silt fence returns should be a minimum of 2 m in length, and can incorporate a tie-back if required. Continue the silt fence around the return and double back to eliminate joins
- Use support posts or Y-post steel standards (waratahs) at a maximum 2 m apart, unless tensioned wire (2.5 mm HT along the top of the silt fence) is used between posts, top and bottom. If tensioned, the distance can be widened to 4 m
- Double the silt fence fabric over and fasten to the wire and posts with wire ties or cloth fastening clips at 150 mm spacing
- Join lengths of fabric by doubling over fabric ends around a wooden post or batten, or by stapling the fabric ends to a batten and butting the battens together
- Recommended maximum slope lengths, spacing of returns and angles for silt fences are given in the adjacent table
- Excavate a trench at least 100 mm wide and 200 mm deep along the proposed line of the silt fence
- Install the support posts on the downslope edge of the trench. These should be tanalised timber of a minimum of 50 mm square, or waratahs at least 1.5 m in length. Drive in until solid, at least 400 mm deep
- Tie silt fence fabric on the upslope side of the support posts to the full depth of the trench
- Silt fence height should not exceed 300-400 mm above ground level
- Backfill the trench with compacted fill
- Use angled waratahs at the end of the silt fence to tension wires
- Reinforce and tension the top of the silt fence with a 2.5 mm support wire (refer back to point 2)
- Where ends of silt fence fabric come together, ensure they are overlapped, folded and stapled to prevent sediment bypass
- Construct extra tie-backs, on the upward side, where water may pond behind the silt fence.